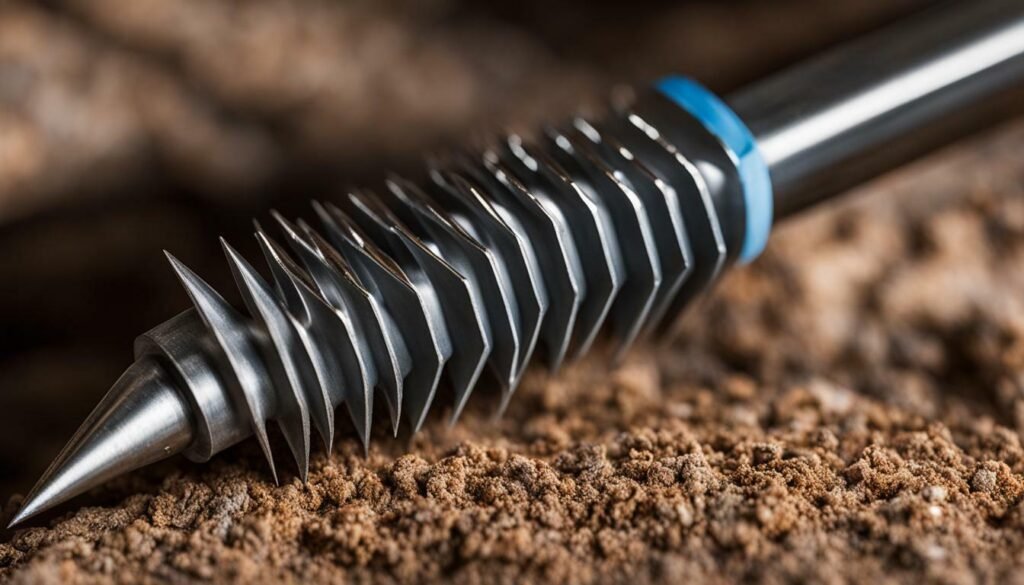
When it comes to termite treatment, the size of the drill bit you use is important. The size of the drill bit depends on the size of the termite tubes you’re treating. If the tubes are small, you’ll need a small drill bit; if they’re large, you’ll need a large drill bit.
The most common termite treatments use a 3/8″ or 1/2″ drill bit. These sizes are suitable for drilling holes that are spaced one inch apart and 18 inches deep, which is recommended for effective termite treatment. Using the right drill bit size ensures that the treatment reaches the intended target areas and maximizes its effectiveness in eradicating termites.
After drilling the holes, it’s crucial to fill them with a pesticide or other termite treatment product. This step is essential in eliminating the termites and preventing further infestation. Additionally, it’s important to use termite drill hole plugs to seal off the drill holes. These plugs help to prevent future termite activity and maintain the integrity of the treatment.
While some homeowners may choose to embark on a DIY termite treatment journey, seeking professional help is often recommended for effective results. Termite treatment experts have the knowledge and specialized tools required to tackle termite infestations efficiently and effectively. Their expertise can save you time, money, and the frustration that may come with unsuccessful DIY attempts.
Key Takeaways:
- Choose the drill bit size based on the size of the termite tubes you’re treating.
- The most common drill bit sizes for termite treatment are 3/8″ and 1/2″.
- Drill the treatment holes one inch apart and 18 inches deep for optimal effectiveness.
- Fill the drilled holes with a pesticide or other termite treatment product.
- Seal off the drill holes with termite drill hole plugs to prevent further termite activity.
- Consider seeking professional help for efficient and effective termite treatment.
Why Drill Bit Size Matters in Termite Treatment
When it comes to termite treatment, the size of the drill bit you use plays a crucial role in the effectiveness of your efforts. Choosing the right drill bit size can make a significant difference in controlling and eliminating termite infestations. So, why does drill bit size matter in termite treatment?
Termite tubes vary in size, and the size of the drill bit you use should be compatible with these tubes. If the termite tubes are small, a small drill bit is required to create precise and accurate holes for treatment. Conversely, if the tubes are large, a larger drill bit is needed to ensure adequate coverage and penetration of the treatment product.
For most termite treatments, the recommended drill bit sizes are 3/8″ and 1/2″. These sizes are commonly used because they strike a balance between providing sufficient space for the treatment product and minimizing damage to the structure. It’s important to follow the guidelines provided by termite treatment experts or pest control professionals to determine the appropriate drill bit size for your specific situation.
Once the termite treatment holes are drilled, filling them with a pesticide or other termite treatment product is crucial. The treatment penetrates the drilled holes, reaching the termites in their galleries and effectively eliminating them. Additionally, termite drill hole plugs are essential for sealing off the drilled holes, preventing further termite activity, and maintaining the structural integrity of the treated area.

Choosing the Right Drill Bit for Termite Treatment
When choosing a drill bit for termite treatment, keep in mind the size of the termite tubes and the compatibility of the drill bit size. Working with a professional termite treatment expert can provide invaluable insights and guidance in selecting the best drill bit for your specific needs. They have the knowledge, experience, and specialized tools required for effective termite treatment.
Using the right drill bit size is just one aspect of a comprehensive termite treatment plan. It’s essential to follow proper techniques, such as drilling holes at the recommended spacing and depth, and filling them with the appropriate treatment product. By combining these practices with preventive measures and professional assistance, you’ll be well-equipped to combat termites and protect your property.
Section 3: Common Drill Bit Sizes for Termite Treatment
When it comes to termite treatment, choosing the right drill bit size is crucial for effective pest control. The size of the drill bit you use depends on the size of the termite tubes you’re treating. A larger termite tube will require a larger drill bit, while a smaller tube will require a smaller bit. In this section, we’ll explore the most common drill bit sizes used for termite treatment.
Two of the most frequently used drill bit sizes for termite treatment are 3/8″ and 1/2″. These sizes are suitable for treating various sizes of termite tubes. The 3/8″ drill bit is commonly used for smaller termite tubes, while the 1/2″ drill bit is commonly used for larger tubes. These sizes provide a good balance between creating effective treatment holes and minimizing damage to your property.
It’s important to note that the drill bit size may vary depending on the specific requirements of your termite treatment. Different termite species and infestation levels may require different drill bit sizes. Consulting with a professional termite treatment expert can help you determine the most appropriate size for your particular situation.
Common Drill Bit Sizes for Termite Treatment
| Drill Bit Size | Suitable Termite Tube Size |
|---|---|
| 3/8″ | Small to medium-sized termite tubes |
| 1/2″ | Medium to large-sized termite tubes |
Using the correct drill bit size is an essential step in the termite treatment process. By matching the size of the drill bit to the size of the termite tubes, you can ensure that the treatment reaches the target areas effectively. Properly sized treatment holes allow for optimal pesticide application, increasing the chances of eliminating the termite infestation.

Properly Drilling Termite Treatment Holes
When it comes to termite treatment, the size of the drill bit you use is important. The size of the drill bit depends on the size of the termite tubes you’re treating. If the tubes are small, you’ll need a small drill bit; if they’re large, you’ll need a large drill bit.
The most common termite treatments use a 3/8″ or 1/2″ drill bit. These sizes are suitable for drilling holes that will effectively treat termite infestations. The holes should be spaced one inch apart and 18 inches deep. This spacing allows for thorough treatment and ensures that all affected areas are covered.
Once the holes are drilled, it’s important to fill them with a pesticide or other termite treatment product. This step ensures that the termites come into contact with the treatment and are eliminated. Additionally, termite drill hole plugs should be used to seal off the drill holes. These plugs prevent further termite activity and protect your home from reinfestation.

Table: Common Drill Bit Sizes for Termite Treatment
| Termite Tube Size | Recommended Drill Bit Size |
|---|---|
| Small | 3/8″ |
| Medium | 1/2″ |
| Large | 3/4″ |
While DIY termite treatment can be an option, it’s recommended to seek professional help for effective results. Professional termite treatment experts have the knowledge and experience to properly assess and address termite infestations. They also have access to specialized termite tools that can enhance the effectiveness of the treatment.
By finding the right size drill bit and employing proper techniques, you can effectively combat termites and protect your home. Remember to follow the recommended drill hole size, fill the holes with the appropriate treatment, and use termite drill hole plugs to seal off the holes. Seeking professional help and implementing preventive measures can also go a long way in preventing termite infestations and minimizing the need for extensive treatment.
Filling Termite Treatment Holes with Pesticide
Once the termite treatment holes are drilled, it’s crucial to fill them with a pesticide or other termite treatment product. This step is essential to eliminate existing termites and prevent further infestations. Filling the holes effectively ensures that the treatment reaches the termites and their colonies, maximizing the effectiveness of your efforts.
When selecting a pesticide for termite treatment, it’s important to choose a product specifically designed for this purpose. These products are formulated to target termites and have a lasting residual effect to provide long-term protection for your home.
To properly apply the treatment, follow the manufacturer’s instructions for the specific pesticide you are using. This may involve mixing the pesticide with water or applying it directly to the holes using a sprayer or injection equipment. Take care to distribute the treatment evenly and ensure it reaches the desired depth within the holes.
After filling the termite treatment holes, it’s important to seal them off with termite drill hole plugs. These plugs prevent further termite activity and help maintain the integrity of the treatment. Use plugs that are specifically designed for termite treatment holes and follow the manufacturer’s instructions for installation. With the holes properly filled and sealed, you can have peace of mind knowing that your termite treatment is well-executed and will deliver the desired results.

| Key Points | Tips |
|---|---|
| Choose a pesticide specifically formulated for termite treatment | – Consult with a pest control professional to determine the best product for your situation |
| Follow the manufacturer’s instructions for application | – Use appropriate protective gear when handling pesticides |
| Distribute the treatment evenly and ensure it reaches the desired depth within the holes | – Consider using injection equipment for precise application |
| Seal off the filled holes with termite drill hole plugs | – Use plugs specifically designed for termite treatment holes – Follow manufacturer’s instructions for installation |
Seeking Professional Help for Termite Treatment
When it comes to dealing with termites, it’s important to consider seeking professional help for effective treatment. While DIY options exist, professional termite treatment offers several advantages that can make a significant difference in eliminating these destructive pests from your property.
One of the key benefits of hiring termite treatment experts is their specialized knowledge and experience. These professionals have a deep understanding of termite behavior and colony structure, allowing them to accurately assess the extent of your infestation and devise targeted treatment plans. They are also equipped with specialized termite tools that enable them to access hard-to-reach areas and ensure thorough treatment.
Another advantage of professional termite treatment is the use of advanced techniques and products. These professionals have access to professional-grade pesticides and treatments that are more potent and effective than what is available to the general public. They also stay up-to-date with the latest advancements in the field, ensuring that they can provide the most efficient and safe treatment options available.
When it comes to termite treatment, time is of the essence. The longer an infestation goes untreated, the more damage termites can cause to your home. By enlisting the help of professionals, you can expedite the treatment process and minimize the risk of further damage. These experts can quickly identify the problem, implement the necessary treatment measures, and provide long-term prevention strategies to safeguard your property.

Remember, effective termite treatment requires a comprehensive approach. While seeking professional help is strongly recommended, it’s also important to implement preventive measures and be proactive in addressing any signs of termite infestation. By working hand in hand with termite treatment experts and staying vigilant, you can protect your home from the devastating effects of termites.
Effective Techniques for Termite Treatment
When it comes to termite treatment, finding effective techniques is crucial for eliminating these destructive pests. While drilling holes is a common method, there are other strategies you can incorporate into your termite control plan. Let’s explore some of the most effective techniques for termite treatment:
1. Chemical Barriers:
Chemical barriers are a popular choice for termite control. These barriers involve applying liquid or foam insecticides around the perimeter of your home or building. As termites come into contact with the treated soil, they are either repelled or killed, preventing them from entering and causing damage. Chemical barriers are best suited for pre-construction or as a preventive measure.
2. Bait Stations:
Bait stations are another effective technique for termite control. These stations consist of cellulose-based materials infused with a slow-acting pesticide. When termites consume the bait, they carry it back to their colony, where it spreads and eliminates the entire population. Bait stations are a non-invasive option and work well for localized termite infestations.
3. Wood Treatment:
Treating wood with insecticides is a targeted approach to termite control. By applying a wood preservative or borate-based solution to vulnerable areas, such as wooden structures or furniture, you create a barrier that repels termites and prevents infestations. Wood treatment is especially effective for protecting high-risk areas prone to termite damage.
4. Heat Treatment:
Heat treatment is an eco-friendly alternative for eliminating termites. This method involves raising the temperature of the infested area to a level that is lethal to termites. Heat can penetrate deep into walls, furniture, and other structures, effectively eradicating termites and their eggs. Heat treatment is particularly useful for localized infestations or when accessing affected areas is challenging.
Remember, it’s important to assess the severity of the infestation and consult with a termite control professional to determine the most suitable technique for your specific situation. By combining effective techniques with the right drill bit size and proper drilling methods, you can protect your property and effectively combat termites.

Preventing Termite Infestations
When it comes to protecting your home from termites, prevention is key. By implementing a few simple termite prevention tips, you can greatly reduce the risk of an infestation. Here are some effective strategies to keep those destructive pests at bay:
- Eliminate moisture: Termites thrive in damp environments, so it’s crucial to address any moisture issues in and around your home. Fix leaky pipes, ensure proper drainage, and keep gutters clear to prevent water buildup.
- Remove food sources: Termites feed on wood and cellulose materials, so it’s important to minimize their access to these food sources. Store firewood away from your house, remove any decaying wood or stumps from your yard, and avoid direct wood-to-soil contact.
- Seal cracks and gaps: Termites can enter your home through even the tiniest cracks and gaps. Regularly inspect your home’s foundation, walls, and windows for any openings and seal them with caulk or weatherstripping.
- Maintain ventilation: Adequate ventilation helps to keep your home dry and termite-free. Ensure that attics, crawl spaces, and basements are properly ventilated to discourage termite activity.
- Regular inspections: Schedule regular termite inspections with a professional pest control company. They will be able to identify any signs of termite activity and provide appropriate treatment if necessary.
Implementing these termite prevention tips can go a long way in safeguarding your home. However, it’s important to remember that prevention measures are not foolproof, and even the most diligent homeowner can still experience a termite infestation. In such cases, it’s best to seek professional help to effectively eliminate the termites and prevent further damage to your property.
Additional Tips for Termite Prevention
Here are a few more tips to enhance your termite prevention efforts:
- Install termite barriers: Physical barriers, such as stainless steel mesh or termite-resistant materials, can be installed during construction to deter termites from entering your home.
- Consider termite baits: Termite baits can be strategically placed around your property to attract and eliminate termite colonies. This can be an effective long-term solution for termite control.
- Regularly monitor wooden structures: Keep an eye out for any signs of termite damage on wooden structures, such as fences, decks, and outdoor furniture. Early detection can prevent the infestation from spreading.
Image:

| Termite Prevention Tip | Description |
|---|---|
| Eliminate moisture | Fix leaks and improve drainage to reduce moisture levels in and around your home. |
| Remove food sources | Store firewood away from your home and remove decaying wood or stumps from your yard. |
| Seal cracks and gaps | Address any openings in your home’s foundation, walls, and windows to prevent termite entry. |
| Maintain ventilation | Ensure proper ventilation in attics, crawl spaces, and basements to deter termite activity. |
| Regular inspections | Schedule professional termite inspections to detect and treat any termite infestations. |
Understanding Termite Behavior and Colony Structure
When it comes to effective termite treatment, understanding termite behavior and colony structure is crucial. By gaining insight into their habits and biology, you’ll be better equipped to combat these destructive pests. Here, we’ll explore the fascinating world of termites and shed light on their behavior.
Termites are social insects that live in large colonies. These colonies consist of different castes, each with specific roles and responsibilities. The castes include workers, soldiers, and reproductives. Workers are the most abundant and are responsible for foraging, feeding the colony, and constructing tunnels and galleries. Soldiers, as the name suggests, defend the colony against threats. Reproductives, also known as swarmers, are responsible for establishing new colonies.
Termite behavior revolves around their need for cellulose, which is found in wood and other plant materials. They feed on cellulose to obtain the nutrients necessary for survival. This feeding habit is what makes them a significant threat to homes and structures, as they can cause extensive damage over time.
Termite Colony Structure
The structure of a termite colony is complex and well-organized. It typically consists of a central chamber where the queen resides, continuously laying eggs to maintain the population. The queen is attended to by workers who provide her with food and grooming.
The workers, as mentioned earlier, are responsible for constructing elaborate tunnel systems that connect the colony to food sources. These tunnels, also known as termite tubes, provide protection and moisture control for the termites as they travel between their nest and food sources.
Understanding the behavior and structure of termite colonies is essential for effective termite treatment. By disrupting their tunnels and eliminating the colony’s food sources, you can help prevent further infestation and protect your home from damage.
| Termite Behavior | Termite Colony Structure |
|---|---|
| Termites are social insects that live in large colonies. | The colony consists of a central chamber where the queen resides. |
| Worker termites are responsible for foraging, feeding the colony, and constructing tunnels and galleries. | Elaborate tunnel systems connect the colony to food sources. |
| Soldier termites defend the colony against threats. | Termite tunnels provide protection and moisture control. |
| Reproductive termites establish new colonies. | The queen lays eggs to maintain the population. |
| Termites feed on cellulose found in wood and other plant materials. | The queen is attended to by worker termites. |
By understanding termite behavior and colony structure, you can take proactive steps to protect your home and effectively treat termite infestations. Remember, prevention is key, so be sure to implement termite control measures to reduce the risk of future infestations.

The Impact of Termites on Homes
Termites can wreak havoc on your home if left untreated. These tiny pests are known for their insatiable appetite for wood and can cause significant structural damage over time. Understanding the signs of termite infestation and the potential impact on your property is crucial for early detection and effective treatment.
Signs of termite damage can vary depending on the extent of the infestation. Some common indicators include:
- Hollow or damaged wood: Termites feed on wood from the inside out, leaving wooden structures hollow or weakened. If you tap on a beam or piece of furniture and it sounds hollow, it could be a sign of termite activity.
- Mud tubes: Subterranean termites build mud tubes along walls, foundations, or other surfaces to protect themselves as they travel between their nest and food sources. These tubes can be a clear sign of termite presence.
- Discarded wings: Swarmers, the reproductive termites, shed their wings after mating. Finding discarded wings around your home, especially near windowsills or light sources, may indicate the presence of a termite colony.
- Tight-fitting doors and windows: As termites consume wood, they can cause doors and windows to become difficult to open or close properly. If you’re struggling with sticky or misaligned doors and windows, it’s worth investigating for termite activity.
If you notice any of these signs, it’s essential to take immediate action. Ignoring a termite infestation can lead to extensive damage, compromising the structural integrity of your home and potentially costing you thousands of dollars in repairs.
| Termite Damage | Signs of Termite Infestation |
|---|---|
| Structural weakening of wood | Hollow or damaged wood |
| Damage to furniture and belongings | Mud tubes along walls or foundations |
| Warped or tight-fitting doors and windows | Discarded wings |
| Costly repairs |
Whether you’ve noticed signs of termite infestation or want to safeguard your home against potential damage, it’s crucial to consult a professional pest control expert. They can assess the extent of the infestation, recommend appropriate treatment methods, and provide expert guidance to protect your property from further termite activity.

Remember, early detection and proactive treatment are key to minimizing the impact of termites on your home. Regular inspections and prompt action can help you safeguard your property and maintain its value for years to come.
DIY vs. Professional Termite Treatment: Pros and Cons
When it comes to termite treatment, you have two options: tackle it yourself or hire a professional. Both approaches have their advantages and disadvantages. Let’s weigh the pros and cons of each to help you make an informed decision.
DIY Termite Treatment
Pros:
- Cost-effective: DIY termite treatment can save you money compared to hiring a professional.
- Immediate action: When you spot signs of termites, you can take immediate action without having to wait for an appointment.
- Learning opportunity: Handling termite treatment on your own allows you to gain knowledge and experience in dealing with pests.
Cons:
- Limited effectiveness: DIY treatments may not be as effective as professional methods, especially for severe infestations.
- Lack of expertise: Without proper training, it’s easy to misidentify termite species or miss hidden infestations.
- Equipment and safety: DIY treatments require specialized tools and may involve handling chemicals, which can be risky without proper precautions.
Professional Termite Treatment
Pros:
- Expertise and experience: Professional technicians are trained to identify termite species, assess infestations, and implement appropriate treatment methods.
- Guaranteed results: Most professional services offer warranties or guarantees, providing peace of mind that the treatment will be effective.
- Advanced techniques: Professionals have access to specialized tools, equipment, and products that may not be available to the general public.
Cons:
- Higher cost: Hiring professionals for termite treatment can be more expensive than DIY methods.
- Scheduling: You may need to wait for an appointment, especially during peak termite season.
- Lack of control: With professional treatment, you must rely on the expertise of the technicians and may have limited involvement in the process.
Ultimately, the decision between DIY and professional termite treatment depends on the severity of the infestation, your budget, and your comfort level in handling pesticides and equipment. If the infestation is extensive or you’re unsure about the treatment methods, it’s advisable to seek professional help. Remember, finding the right size drill bit is just one aspect of effective termite treatment, and professionals can offer comprehensive solutions tailored to your specific needs.

Conclusion:
Finding the right size drill bit for termite treatment is crucial for effective pest control. The size of the drill bit depends on the size of the termite tubes you’re treating. If the tubes are small, a small drill bit is required, while larger tubes require a larger drill bit. The most commonly used drill bit sizes for termite treatment are 3/8″ and 1/2″.
When drilling termite treatment holes, it’s important to space them one inch apart and drill them 18 inches deep. This ensures proper coverage and penetration of the treatment. After drilling, it’s essential to fill the holes with a pesticide or other termite treatment product. This helps eliminate the termite infestation and prevent further termite activity.
Using termite drill hole plugs is also crucial. These plugs seal off the drill holes, preventing termites from re-entering or spreading to other areas. Additionally, seeking professional help for termite treatment is recommended. Professional termite treatment experts have the knowledge, experience, and specialized tools needed to effectively eliminate termites from your home.
In conclusion, choosing the right size drill bit and following proper techniques are essential in the battle against termites. By using the appropriate drill bit size, drilling the treatment holes correctly, filling them with the appropriate treatment, and seeking professional assistance when needed, you can effectively combat termites and protect your home from their destructive impact.
FAQ
Q: What size drill bit should I use for termite treatment?
A: The size of the drill bit depends on the size of the termite tubes you’re treating. If the tubes are small, you’ll need a small drill bit; if they’re large, you’ll need a large drill bit. The most common termite treatments use a 3/8″ or 1/2″ drill bit.
Q: How should I space the drill holes for termite treatment?
A: The drill holes should be spaced one inch apart.
Q: How deep should the drill holes be for termite treatment?
A: The drill holes should be 18 inches deep.
Q: What should I fill the drill holes with for termite treatment?
A: It’s important to fill the drill holes with a pesticide or other termite treatment product.
Q: Why are termite drill hole plugs important?
A: Termite drill hole plugs are important to seal off the drill holes and prevent further termite activity.
Q: Can I do termite treatment myself or should I seek professional help?
A: While DIY termite treatment can be an option, it’s recommended to seek professional help and use specialized termite tools for effective treatment.
Q: Are there other techniques for termite treatment besides drilling holes?
A: Yes, in addition to drilling holes, there are other effective techniques for termite treatment, such as using barriers and baits.
Q: How can I prevent termite infestations?
A: To prevent termite infestations, it’s important to take preventive measures such as keeping your home dry, removing wood debris, and sealing entry points.
Q: What are the signs of termite infestation?
A: Signs of termite infestation include mud tubes, hollow-sounding wood, discarded wings, and droppings.
Q: What are the pros and cons of DIY termite treatment versus professional assistance?
A: DIY termite treatment can be cost-effective but may not be as effective as professional treatment. Professional assistance offers expertise and access to specialized tools, but it comes at a higher cost.
Source Links
- https://www.eliminexpestcontrol.com/the-right-size-drill-bit-for-your-termite-treatment/
- https://oatuu.org/subterranean-termite-treatment-drilling-how-to-effectively-tackle-the-hidden-invaders/
- https://oatuu.org/what-size-drill-bit-for-termite-treatment/
Your Expert in Animal Control and Extermination. Trust our experience for humane, effective pest management, protecting your property and ensuring peace of mind with Michael S.