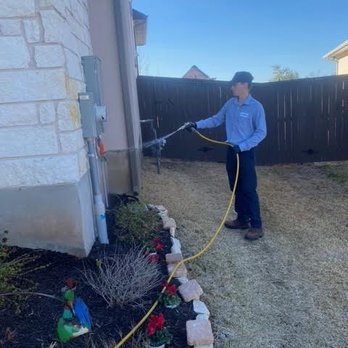
So, you’ve just had your home treated for pesky termites, and now you’re left with a few unsightly holes in your walls. No need to worry though, because in this article, we’ll show you exactly how to fill those termite treatment holes. With just a few simple steps, you’ll have your walls looking as good as new in no time. So grab your tools and let’s get started on restoring the beauty of your home!
Understanding Termite Treatment Holes
Explanation of Termite Treatment Holes
Termite treatment holes, also known as injection holes, are small openings created in the infested wood to introduce termiticides or other treatment products directly into the termite colonies. These holes serve as access points for the treatment, allowing it to reach the core of the infestation and effectively eliminate the termites. Termite treatment holes are an essential part of any termite eradication process, as they provide targeted treatment and increase the chances of successful elimination.
Why Termite Treatment Holes are Essential
Termite treatment holes are essential for several reasons. Firstly, they allow for direct application of termiticides or treatment products into the termite colonies, ensuring that the treatment reaches the source of the infestation. This targeted approach increases the effectiveness of the treatment and reduces the likelihood of termites surviving or spreading further. Additionally, termite treatment holes enable thorough coverage of the affected areas, penetrating deep into the wood where termites may be residing. This comprehensive treatment helps eradicate the entire termite population and prevents future infestations.
Identifying Termite Treatment Holes
Characteristics of Treatment Holes
Identifying termite treatment holes is crucial for effective termite control. These holes typically have a small diameter, ranging from 1/8 inch to 3/8 inch, and are evenly spaced along the infested wood. They may appear as round or oval openings, created either manually or through specialized equipment. Termite treatment holes are usually located on the surface of the wood or slightly recessed, depending on the method used for their creation. Identifying these distinctive holes can help homeowners and professionals determine the extent of the infestation and plan appropriate treatment measures.
Where to Locate Treatment Holes
Locating termite treatment holes requires a systematic approach. Start by thoroughly inspecting the infested wood for any visible holes. Focus on areas where termite activity or damage is most evident, such as near mud tubes, wood tunnels, or areas with crumbling or hollow-sounding wood. Holes may be found on both exteriors and interiors of structural elements such as walls, wooden furniture, or wooden beams. Consult with a professional termite inspector or exterminator if you are unsure about locating the treatment holes accurately.
Materials Required to Fill Termite Treatment Holes
Specific Types of Fillers
Different types of fillers can be used to fill termite treatment holes, and the choice depends on several factors such as the size of the holes, the type of wood being treated, and the desired aesthetics. Common fillers include wood putty, epoxy resin, or cementitious patching compounds. Wood putty is suitable for smaller holes and provides a seamless finish. Epoxy resin is recommended for larger holes that need a more durable and long-lasting solution. Cementitious patching compounds are ideal for exterior termite treatment holes as they can withstand weather conditions.
Tools Needed
To fill termite treatment holes, you will need a set of essential tools. These include a putty knife, a small drill or screwdriver, sandpaper, and a caulking gun for applying the chosen filler. The putty knife is used to remove any loose debris around the holes and apply the filler smoothly. The drill or screwdriver is used to create the treatment holes if they are not already present. Sandpaper helps in smoothing the filled holes, ensuring a seamless finish. The caulking gun allows for precise application of the filler material.
Safety Equipment
Ensuring safety during the filling process is crucial. Wear safety goggles to protect your eyes from flying debris or filler materials. Additionally, gloves should be worn to avoid direct contact with the fillers, which may contain chemicals or irritants. If using epoxy resin or other chemical-based fillers, consider using a mask to prevent inhalation of fumes. Prioritize safety and take necessary precautions to protect yourself during the termite treatment hole filling process.
Choosing the Right Filler for Termite Holes
Importance of Choosing Correct Filler
Choosing the correct filler for termite holes is vital to ensure the longevity and effectiveness of the treatment. The filler should have excellent adhesive properties to bond with the wood and provide a durable seal. Furthermore, the filler should be resistant to moisture, as termites are attracted to damp environments. Opting for a filler that matches the color and texture of the wood can also enhance the aesthetic appeal of the treated surface. Selecting the right filler guarantees a seamless finish and prevents further termite infestation.
Common Types of Suitable Fillers
Several types of fillers are commonly used for filling termite treatment holes. Wood putty is a popular choice for minor surface imperfections and small holes. It is easy to apply and can be stained or painted to match the surrounding wood. Epoxy resin is ideal for larger holes and provides a strong, long-lasting seal. It has excellent adhesive properties and can withstand the environmental conditions. Cementitious patching compounds are suitable for exterior wood surfaces and offer good weather resistance and durability.
Factors to Consider When Choosing Fillers
When selecting fillers, consider the specific requirements of your termite treatment holes. Take into account the size and depth of the holes, the characteristics of the wood being treated, and the desired appearance of the filled surface. Ensure that the chosen filler is compatible with the wood and does not harm its structural integrity. If you are unsure about the appropriate filler for your needs, consult a professional termite exterminator or refer to the manufacturer’s recommendations for guidance.
Preparing for the Process
Cleaning the Holes
Before filling termite treatment holes, it is essential to clean them thoroughly. Use a putty knife or a small brush to remove any loose debris or wood particles from the holes. Cleaning the holes ensures better adhesion of the filler and a more seamless finish. Take care not to enlarge the holes or cause any additional damage to the surrounding wood during the cleaning process.
Preparing the Filler
Prepare the chosen filler according to the manufacturer’s instructions. Follow the recommended mixing ratios and ensure that the filler is thoroughly blended. If using epoxy resin, mix the resin and hardener components in the specified proportions. Remember to work quickly, as some fillers may have a limited working time before they begin to harden. Prepare only the amount of filler that can be used within the recommended time frame to avoid waste.
Setting up Safety Measures
Before starting the filling process, establish proper safety measures. Ensure that the area is well-ventilated to prevent the accumulation of any noxious fumes. If necessary, use fans or open windows to improve air circulation. If you are working indoors, consider using plastic sheeting or drop cloths to protect surrounding surfaces from spills or drips. Keep children and pets away from the work area to avoid any potential hazards. Following these safety measures will help minimize risks during the termite treatment hole filling process.
Step by Step Guide to Fill Treatment Holes
Initial Steps
- Clean the treatment holes using a putty knife or small brush to remove loose debris.
- Check the depth of the holes and ensure they are free from any obstructions.
- Prepare the chosen filler according to the manufacturer’s instructions.
- Use sandpaper to smooth the surface around the holes if necessary.
Filling Process
- Load the filler into a caulking gun or use a putty knife to fill the holes.
- Apply the filler directly into the holes, ensuring it fills the void completely.
- Smooth the surface of the filler using a putty knife or a wet finger.
- Remove any excess filler and ensure the filled holes are level with the surrounding wood.
- Allow the filler to cure or dry completely as per the manufacturer’s instructions.
- If necessary, sand the filled holes to achieve a seamless finish.
Post-Filling Steps
- Inspect the filled holes for any imperfections or unevenness.
- Touch up the filled holes, if required, to achieve a uniform appearance.
- Clean any residual filler from the surrounding area using a damp cloth or mild cleaner.
- Allow the filled holes to fully cure or dry before reapplying any finishes or treatments.
Safety Measures During Filling Process
Precautions While Handling Materials
When handling filler materials, take necessary precautions to ensure your safety. Avoid direct contact with the fillers and wear gloves to protect your hands from irritation or exposure to chemicals. If using epoxy resin, follow the specific safety guidelines provided by the manufacturer, including the use of gloves, masks, or other protective equipment. Avoid inhaling fumes from chemical-based fillers by working in a well-ventilated area or using a mask if necessary.
Ensuring Personal Safety
During the filling process, prioritize personal safety to avoid injuries or accidents. Wear safety goggles to protect your eyes from any flying debris or filler materials. If using power tools such as drills or sanders, wear appropriate protective gear, including ear protection and safety glasses. Keep the work area clean and free from obstacles to prevent tripping or falling hazards.
Disposing of Used Materials Safely
After completing the filling process, dispose of any used materials responsibly. Follow local guidelines for the safe disposal of epoxy resin, chemical-based fillers, or any other materials. Avoid pouring excess filler or cleaning solutions down drains or sewers to prevent environmental contamination. Properly seal and discard used gloves or other disposable protective equipment. By disposing of materials safely, you contribute to maintaining a clean and healthy environment.
Mistakes to Avoid When Filling Termite Holes
Common Errors
While filling termite treatment holes, certain mistakes should be avoided for optimal results. One common error is not cleaning the holes properly before filling, which can compromise the adhesion and effectiveness of the filler. Another mistake is overfilling the holes, resulting in an uneven or unsightly appearance. Conversely, underfilling the holes may leave gaps or allow future termite infestations to occur. Neglecting to follow the manufacturer’s instructions for filler preparation and curing times is another mistake that can lead to subpar results.
Consequences of Incorrect Filling
Incorrectly filling termite treatment holes can have consequences that diminish the effectiveness of the treatment. Inadequate cleaning of the holes can prevent proper adhesion of the filler, leading to its premature failure or detachment from the wood. Overfilling the holes can result in an uneven surface or excess filler that is difficult to sand or blend with the surrounding wood. Underfilling the holes may not provide sufficient protection against further termite infestations, leaving the wood vulnerable to future damage and infestation.
Tips to Avoid Mistakes
To avoid common mistakes when filling termite treatment holes, follow these tips:
- Thoroughly clean the holes to ensure optimal adhesion and longevity of the filler.
- Take care not to overfill or underfill the holes to achieve a seamless and effective treatment.
- Follow the manufacturer’s instructions regarding the preparation and curing of the chosen filler.
- Consider consulting a professional termite exterminator or following recommended guidelines for the best results.
- Regularly inspect the filled holes for any signs of damage or recurrence of termite activity.
Maintaining Filled Termite Treatment Holes
Regular Checkups
After filling termite treatment holes, it is important to conduct regular checkups to ensure the effectiveness of the treatment. Monitor the filled holes for any signs of deterioration, cracking, or gaps. Inspect the surrounding wood for new termite activity or damage. Regular checkups allow for early detection of any potential issues and prompt action to address them before they escalate. By vigilantly maintaining the filled termite treatment holes, you can protect your property from future infestations and associated damage.
Signs of Recurrence
While inspecting the filled termite treatment holes, be vigilant for any signs of termite recurrence. Look for freshly dug termite tunnels, frass (termite droppings), or weakened wood. If you notice any of these signs, it may indicate that the treatment was not completely effective or that new infestation has occurred. Promptly addressing such signs is vital to prevent further damage and preserve the structural integrity of the wood.
Immediate Actions to Take if Termites Reappear
If termites reappear after filling the treatment holes, taking immediate action is essential. Contact a professional termite exterminator to assess the situation and recommend appropriate measures. Avoid attempting to treat the infestation on your own, as termites can be resilient and difficult to eradicate completely without professional expertise. Follow the exterminator’s guidance and implement the necessary treatments to eliminate the termites effectively and protect your property from further damage.
Seeking Professional Help
When to Seek Professional Help
While filling termite treatment holes can be done as a DIY project, there may be instances where seeking professional help is necessary. If the termite infestation is extensive or located in hard-to-reach areas, professional assistance may be required to ensure thorough treatment. Additionally, if previous attempts to fill the holes have been ineffective or if termites continue to reappear, professional intervention may be necessary to properly assess and address the ongoing infestation.
Choosing the Right Professional
When selecting a professional termite exterminator, consider the following factors:
- Experience and expertise in termite control.
- Accreditation or certifications from reputable organizations.
- Positive reviews or references from previous clients.
- Transparent pricing and clear communication about the treatment process.
- Use of environmentally-friendly or low-toxicity methods, if desired.
What to Expect from Professional Services
Professional termite exterminators generally provide a comprehensive range of services. They will conduct a thorough inspection of the property to assess the extent of the infestation and identify the best treatment approach. Based on their findings, they will recommend an appropriate treatment plan, which may include filling termite treatment holes and implementing other targeted treatments. Professional services also typically include follow-up visits, monitoring, and assistance with preventive measures to minimize the risk of future infestations. Expect timely and effective solutions when employing professional termite services.
In conclusion, termite treatment holes play a crucial role in effectively addressing and eliminating termite infestations. By understanding the purpose and significance of these holes, homeowners can identify and locate them accurately. Choosing the right filler and following the proper process for filling termite treatment holes ensures successful treatment and prevents future infestations. It is important to maintain and monitor the filled holes regularly, taking immediate action if termite activity reappears. While DIY methods can be effective, seeking professional help may be necessary in certain situations to ensure thorough treatment and long-term termite control. By following these guidelines, homeowners can safeguard their property from the damaging effects of termite infestations and maintain a termite-free environment.
Your Expert in Animal Control and Extermination. Trust our experience for humane, effective pest management, protecting your property and ensuring peace of mind with Michael S.